
Upgrading G3 Mini to 2.5G Networking
In this post, I discuss upgrading HP Elitedesk 800 G3 Mini with 2.5G network adapter and configuring Proxmox to use it.
HP Elitedesk 800 G3 Mini is an affordable computer to have at home for experimenting with various virtualization and containerization technologies. I have been hosting a breadth of home services in a cluster of G3 Minis at home for a while now. While they are performing well usually, 1Gbps networking has been insufficient at times. In this post, I discuss upgrading HP Elitedesk 800 G3 Mini with 2.5G network adapter and configuring Proxmox to use it.

Some information about my homelab setup can be found here.
What to buy?
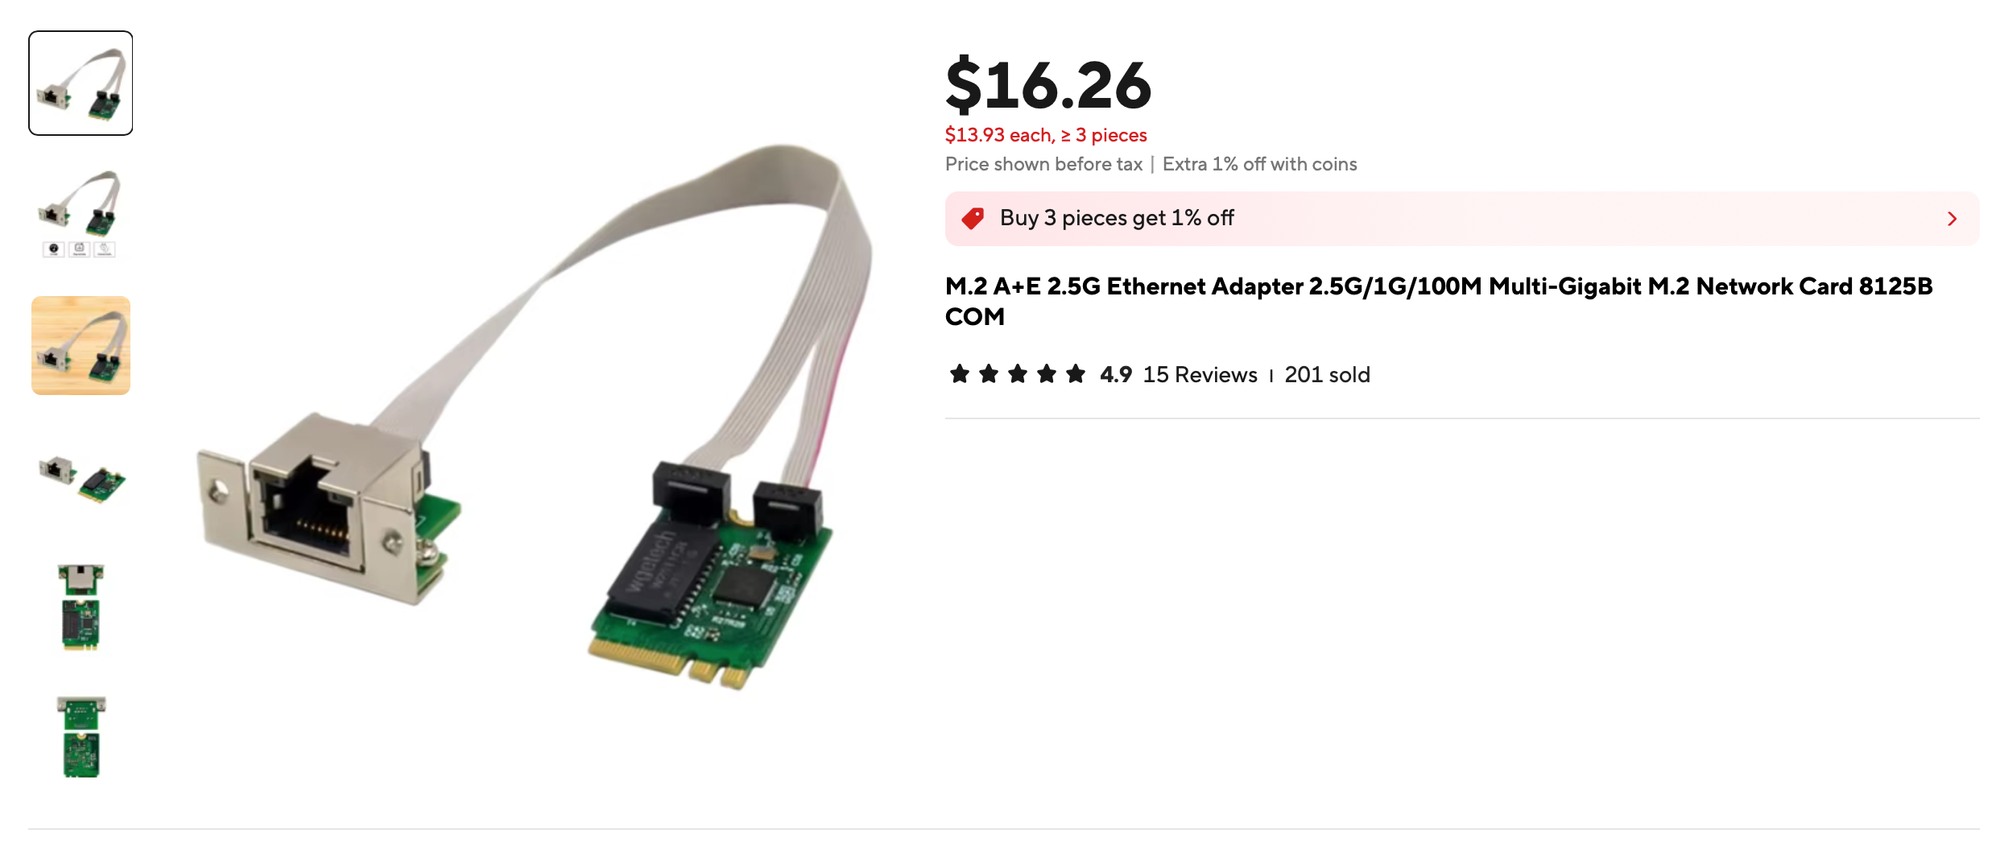
There is an M.2 A+E key slot on this machine. By default, that slot hosts the wi-fi adapter. Since we are after better networking speeds, wi-fi card is irrelevant and luckily, there are M.2 A+E 2.5G network adapters available. Here is the one that I bought from AliExpress.
Installation
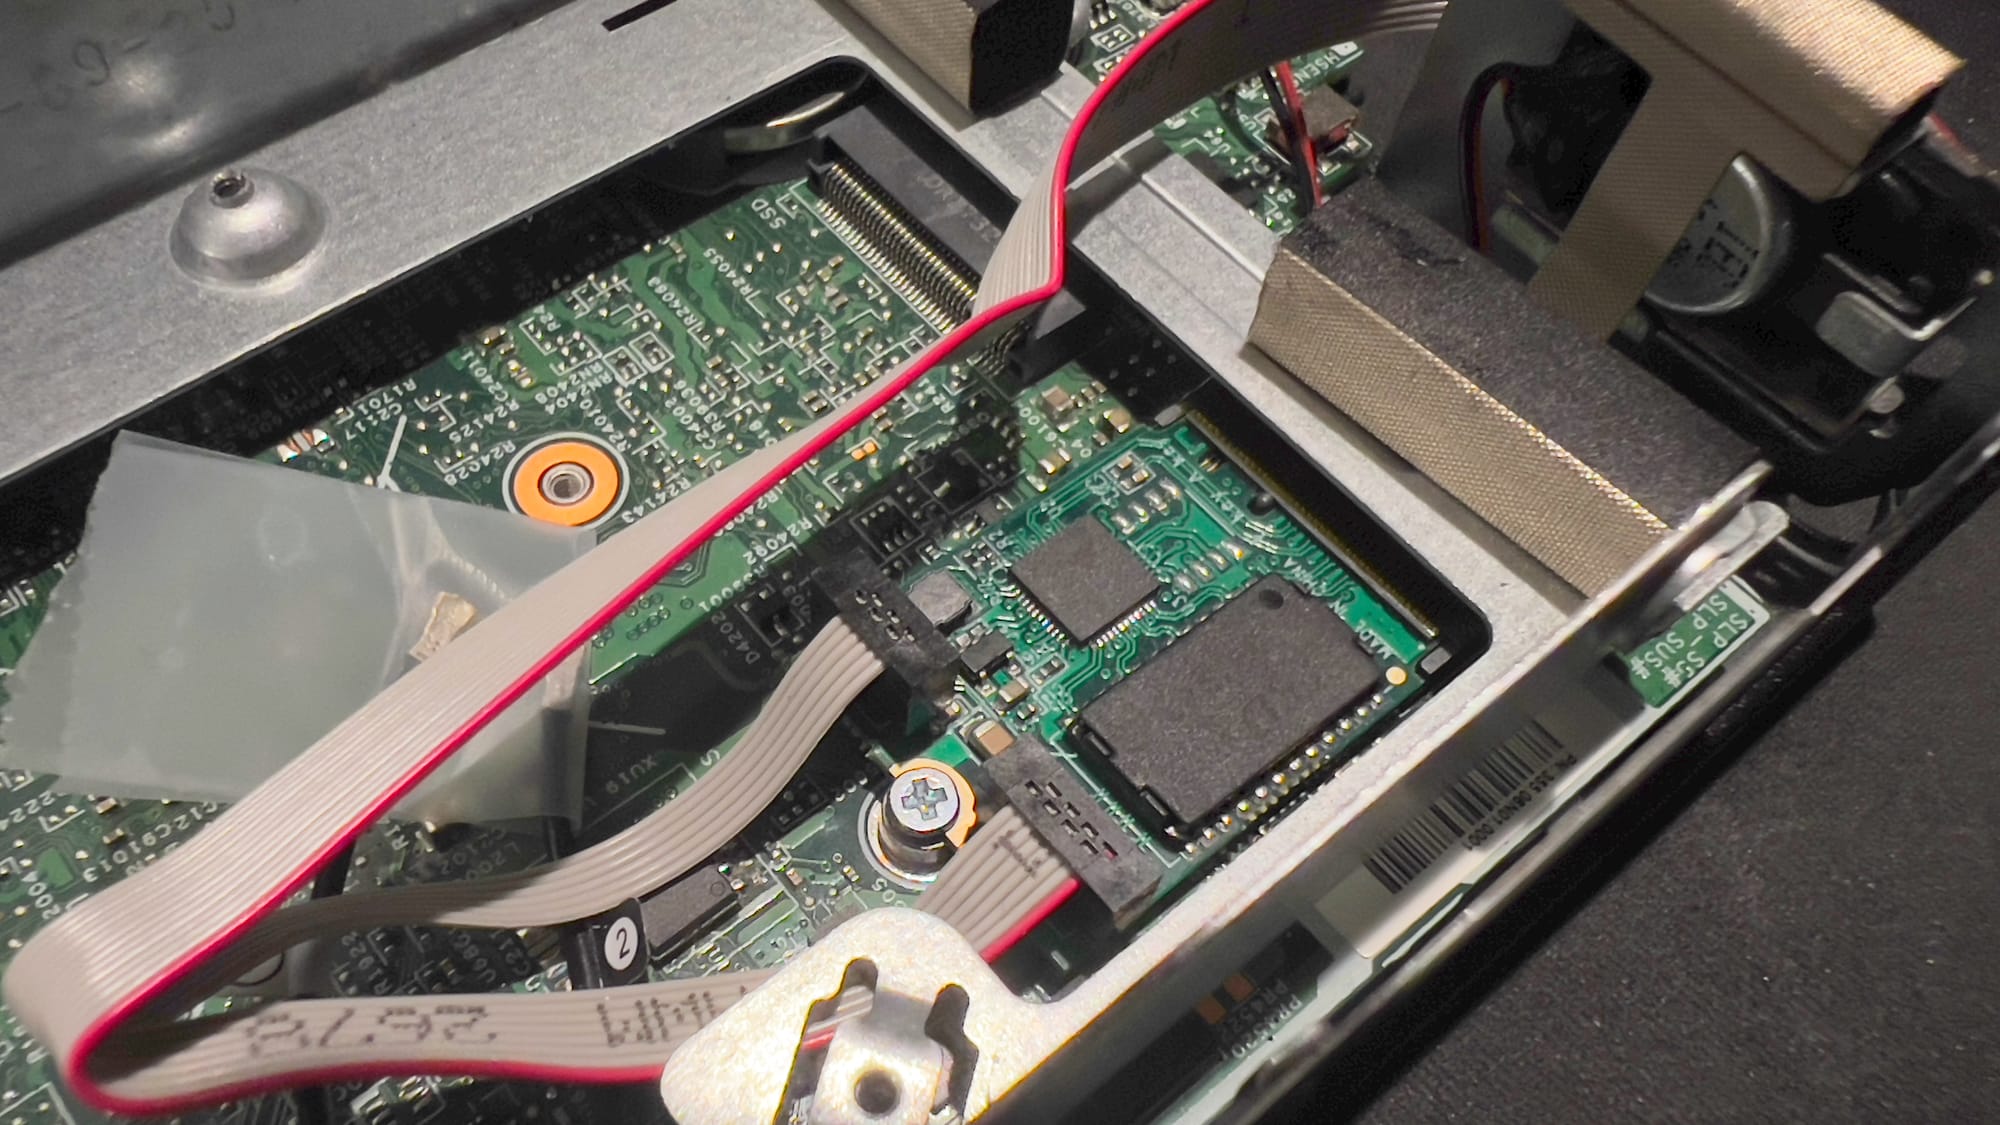
Installing 2.5G NIC requires removing the wi-fi adapter first. Wi-fi adapter is accessible under disk drive enclosure. Just remove the disk and the cover underneath, and you will see the wi-fi adapter. You may need to get creative about how to route the data cable between m.2 board and NIC adapter. Here is what it looks like once it is installed.
This is a good checkpoint to confirm a few things before closing everything up for good. First, we want to see this device as part of device list. I recommend securing the adapter and booting the device. No need to connect it to a cable at this point. Also secure wifi antenna connectors with an electric tape to avoid accidental shorts. I could not find my electric tape so I used clear tape instead. While electric tape is ideal, any nonconducting material should be fine. Once you are in the web interface or ssh, run lspci to find the following:

If you need to further confirm that the device is in fact capable of 2.5G speed, you may run ethtool <interface name> command to get a detailed report of the device as it is recognized by the system. You should see 2500baseT/Full as part of the report.
root@pve03:~# ethtool enp1s0
Settings for enp1s0:
        Supported ports: [ TP    MII ]
        Supported link modes:   10baseT/Half 10baseT/Full
                                100baseT/Half 100baseT/Full
                                1000baseT/Full
                                2500baseT/Full
        Supported pause frame use: Symmetric Receive-only
        Supports auto-negotiation: Yes
        Supported FEC modes: Not reported
        Advertised link modes:  10baseT/Half 10baseT/Full
                                100baseT/Half 100baseT/Full
                                1000baseT/Full
                                2500baseT/Full
        Advertised pause frame use: Symmetric Receive-only
        Advertised auto-negotiation: Yes
        Advertised FEC modes: Not reported
        Link partner advertised link modes:  10baseT/Half 10baseT/Full
                                             100baseT/Half 100baseT/Full
                                             1000baseT/Full
                                             2500baseT/Full
        Link partner advertised pause frame use: Symmetric Receive-only
        Link partner advertised auto-negotiation: Yes
        Link partner advertised FEC modes: Not reported
        Speed: 2500Mb/s
        Duplex: Full
        Auto-negotiation: on
        master-slave cfg: preferred slave
        master-slave status: slave
        Port: Twisted Pair
        PHYAD: 0
        Transceiver: external
        MDI-X: Unknown
        Supports Wake-on: pumbg
        Wake-on: d
        Link detected: yes
2500baseT/Full is part of supported link modes.
Configuration
Now that we have confirmed the adapter is recognized by the system without needing driver installation, we can proceed to configuring it for use in Proxmox.
This is what my /etc/network/interfaces file look like. I ran ip address to get the interface name and added it as an interface first. enp1s0 is the 2.5G in the sample below. For more details once networking, refer to Proxmox wiki.
root@pve03:~# cat /etc/network/interfaces
# network interface settings; autogenerated
# Please do NOT modify this file directly, unless you know what
# you're doing.
#
# If you want to manage parts of the network configuration manually,
# please utilize the 'source' or 'source-directory' directives to do
# so.
# PVE will preserve these directives, but will NOT read its network
# configuration from sourced files, so do not attempt to move any of
# the PVE managed interfaces into external files!

auto lo
iface lo inet loopback

iface eno1 inet manual

iface wlp1s0 inet manual

iface enp1s0 inet manual

auto vmbr0
iface vmbr0 inet static
        address <2.5gbps nic ip>
        gateway <router ip>
        bridge-ports enp1s0
        bridge-stp off
        bridge-fd 0

auto vmbr1
iface vmbr1 inet manual
        address <1gbps nic ip>
        bridge-ports eno1
        bridge-stp off
        bridge-fd 0

source /etc/network/interfaces.d/*Once you have your iface and virtual bridge set up in interfaces file, save and exit, then run a quick reload and it should be good to go:
ifreload -aConnect your favorite network cable to your new NIC, Cat5e at minimum. If all went well, you should be able to access the web UI via the ip address of the virtual bridge port you defined in interfaces file.
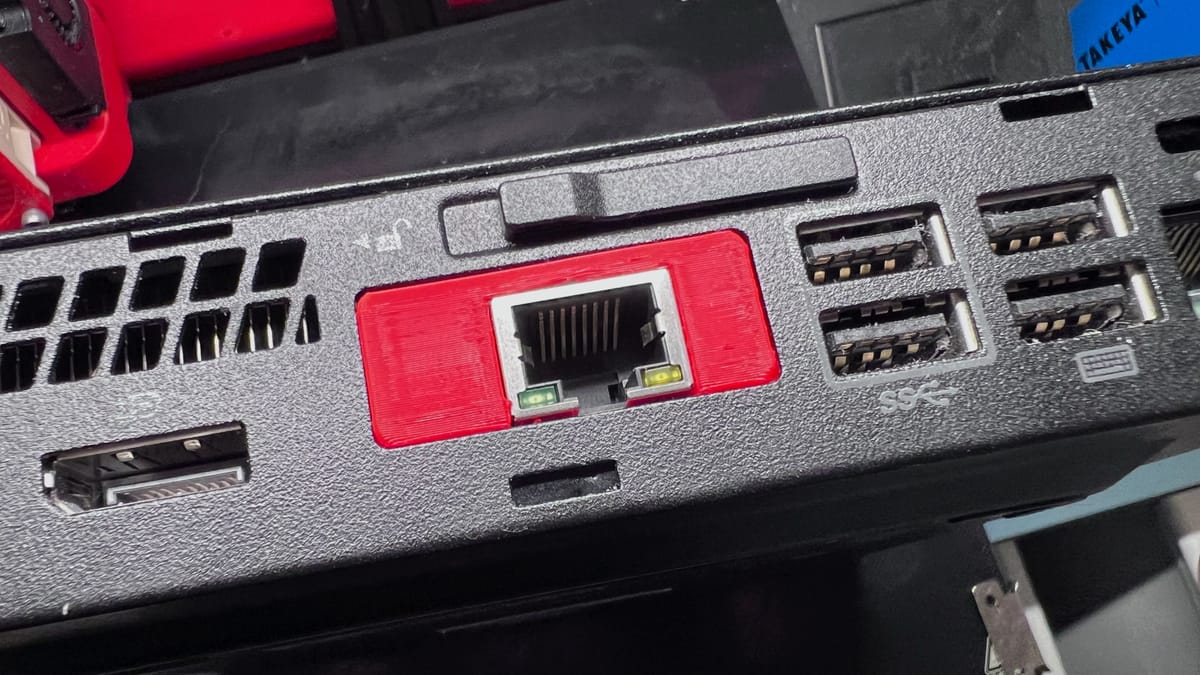
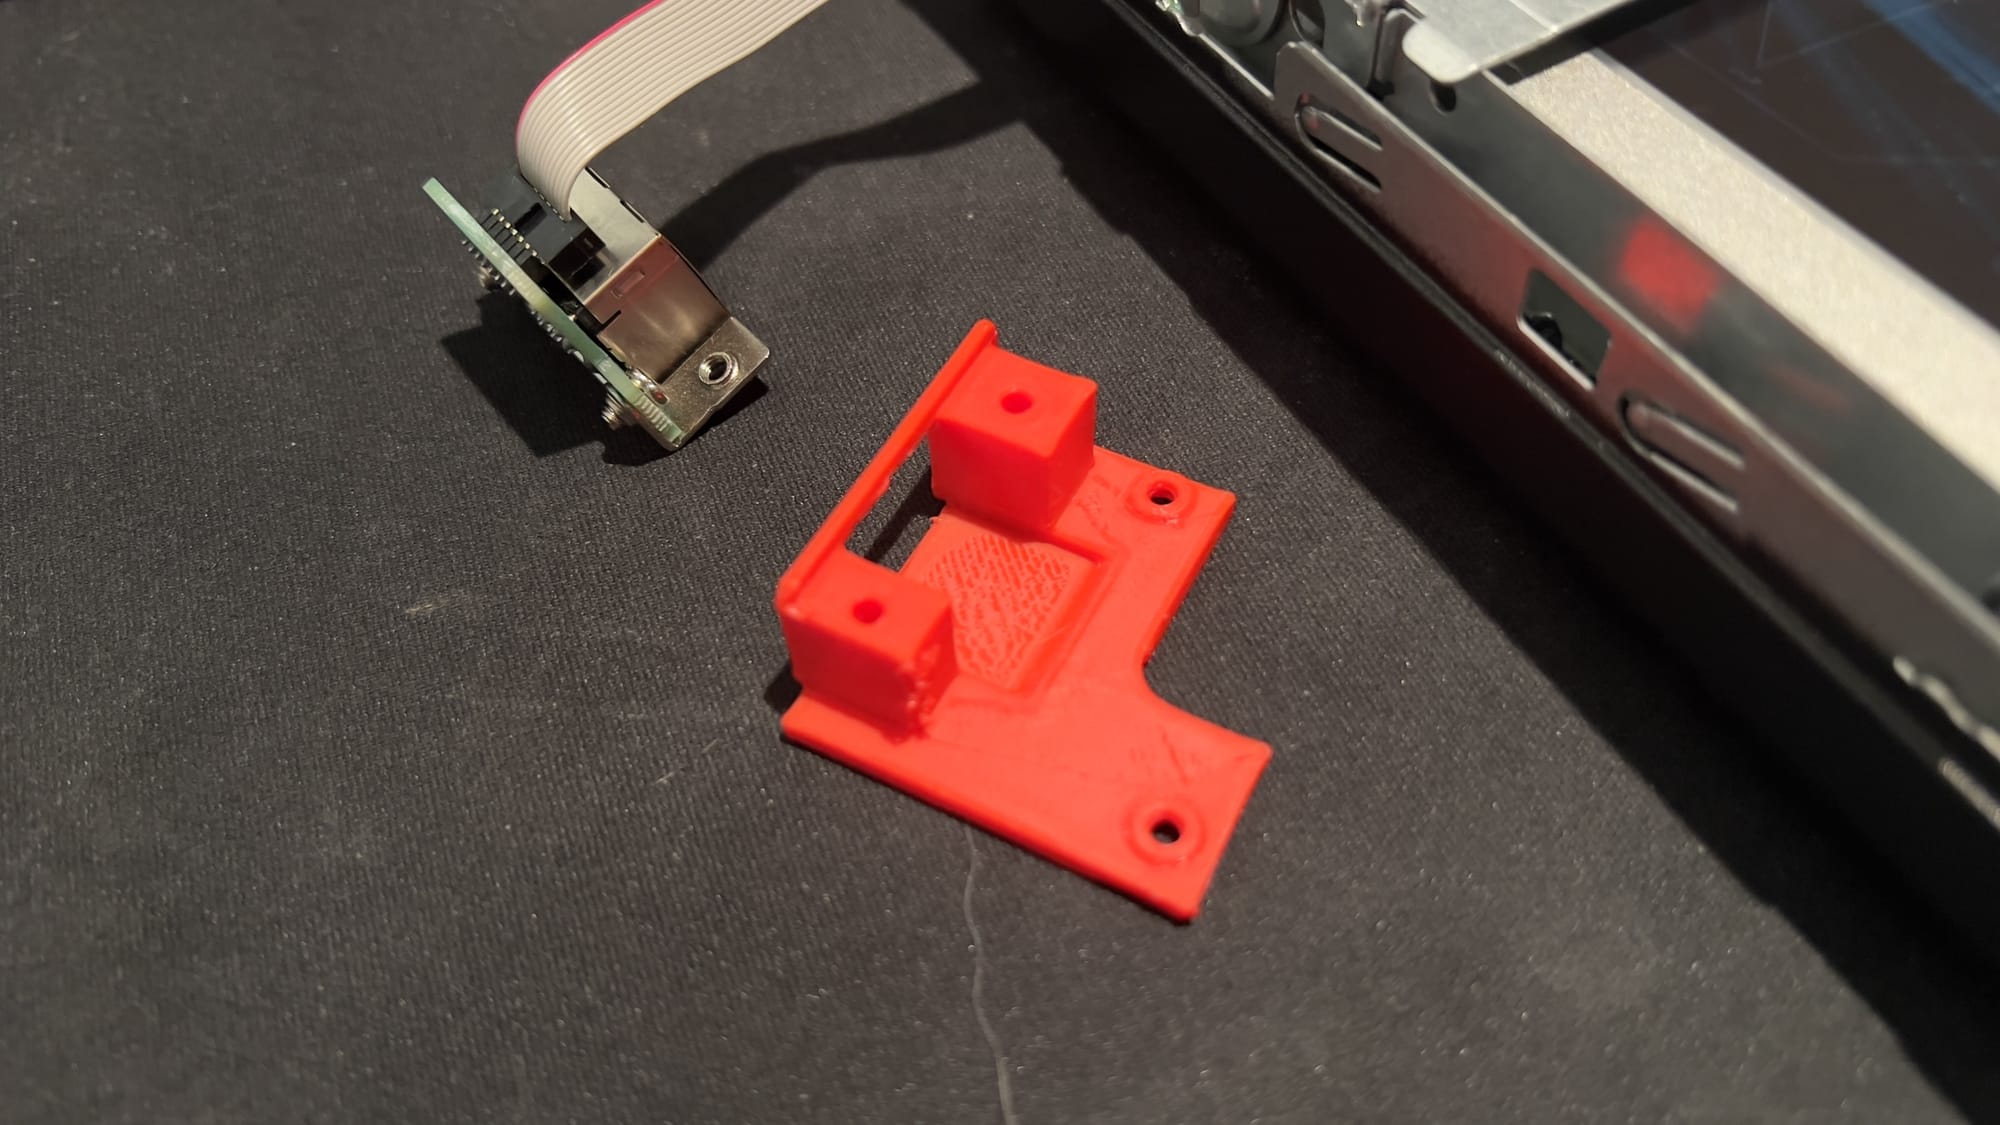
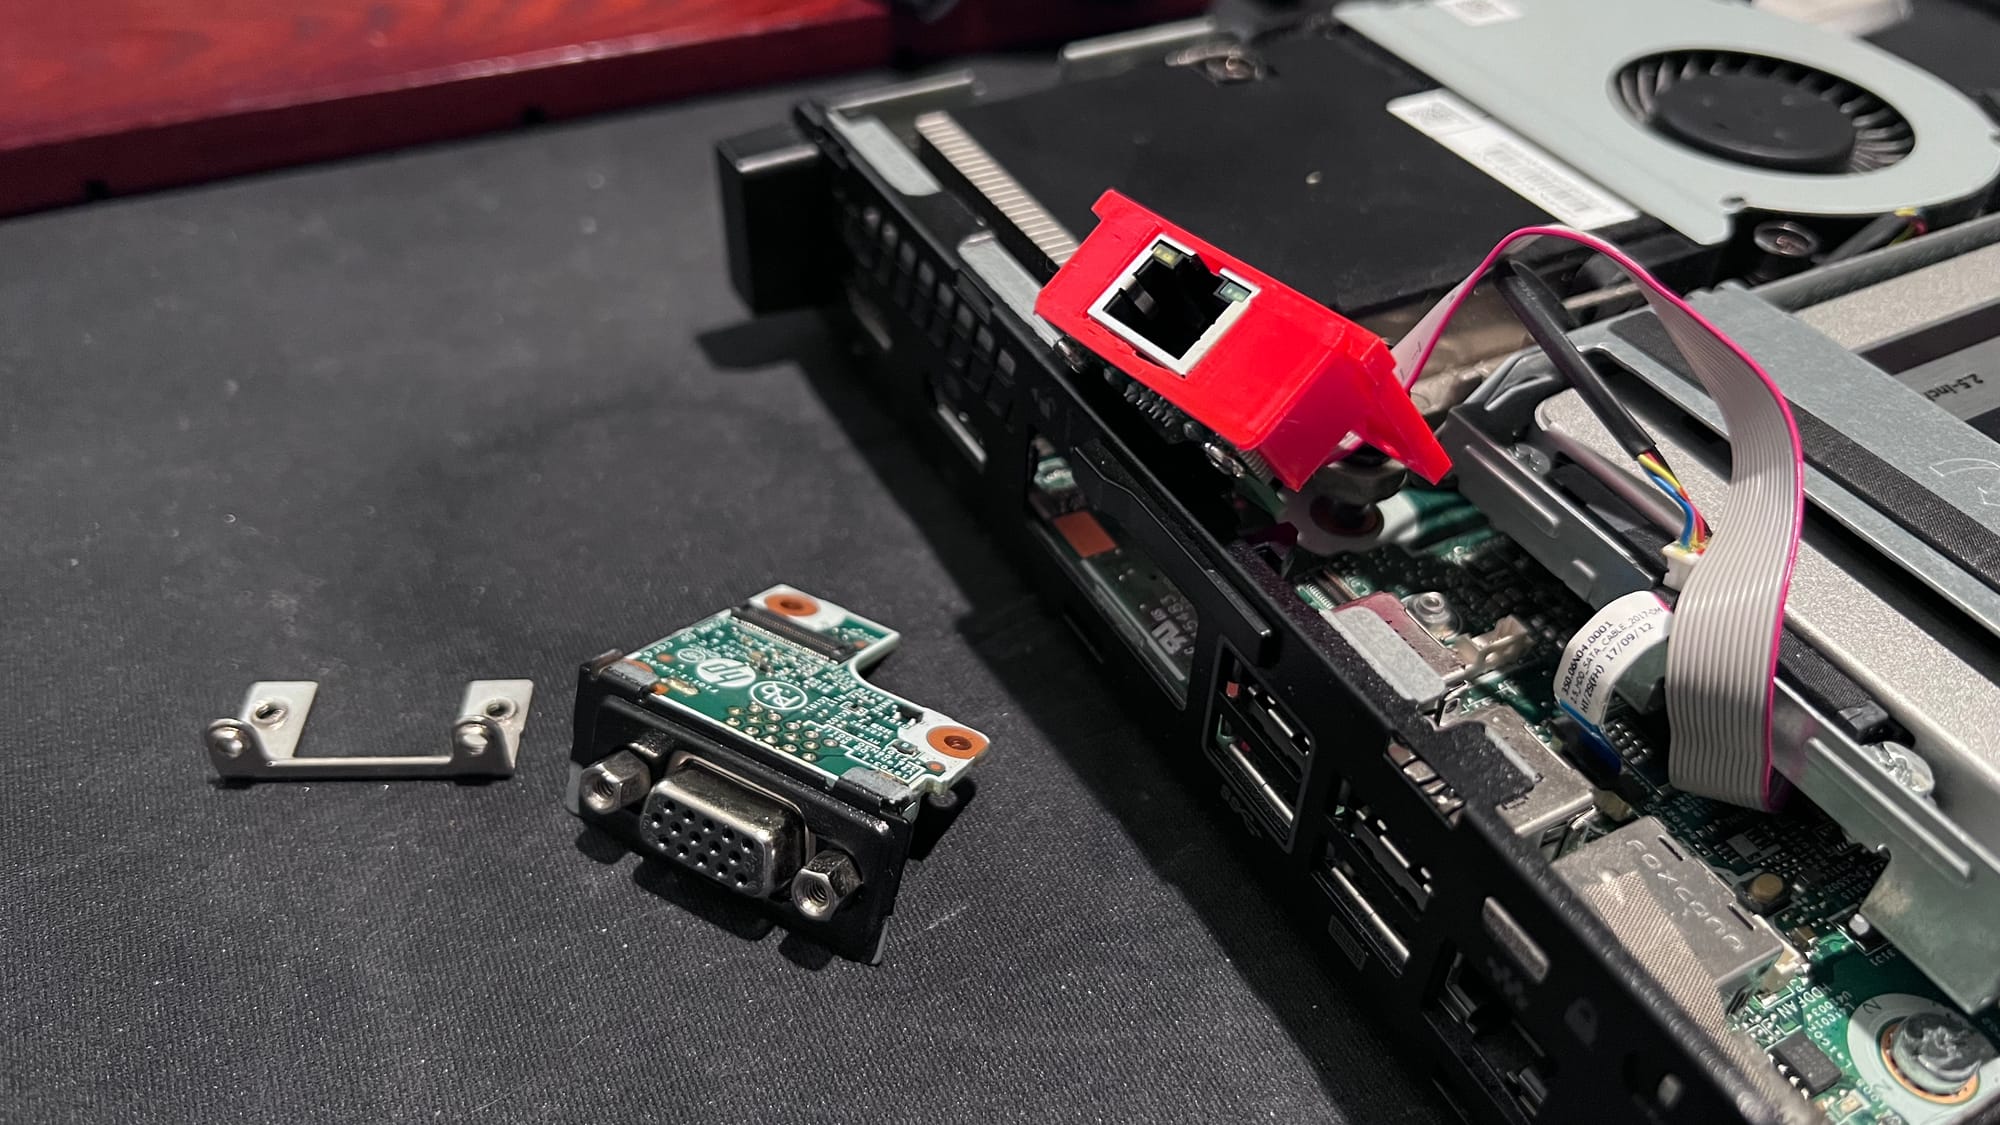
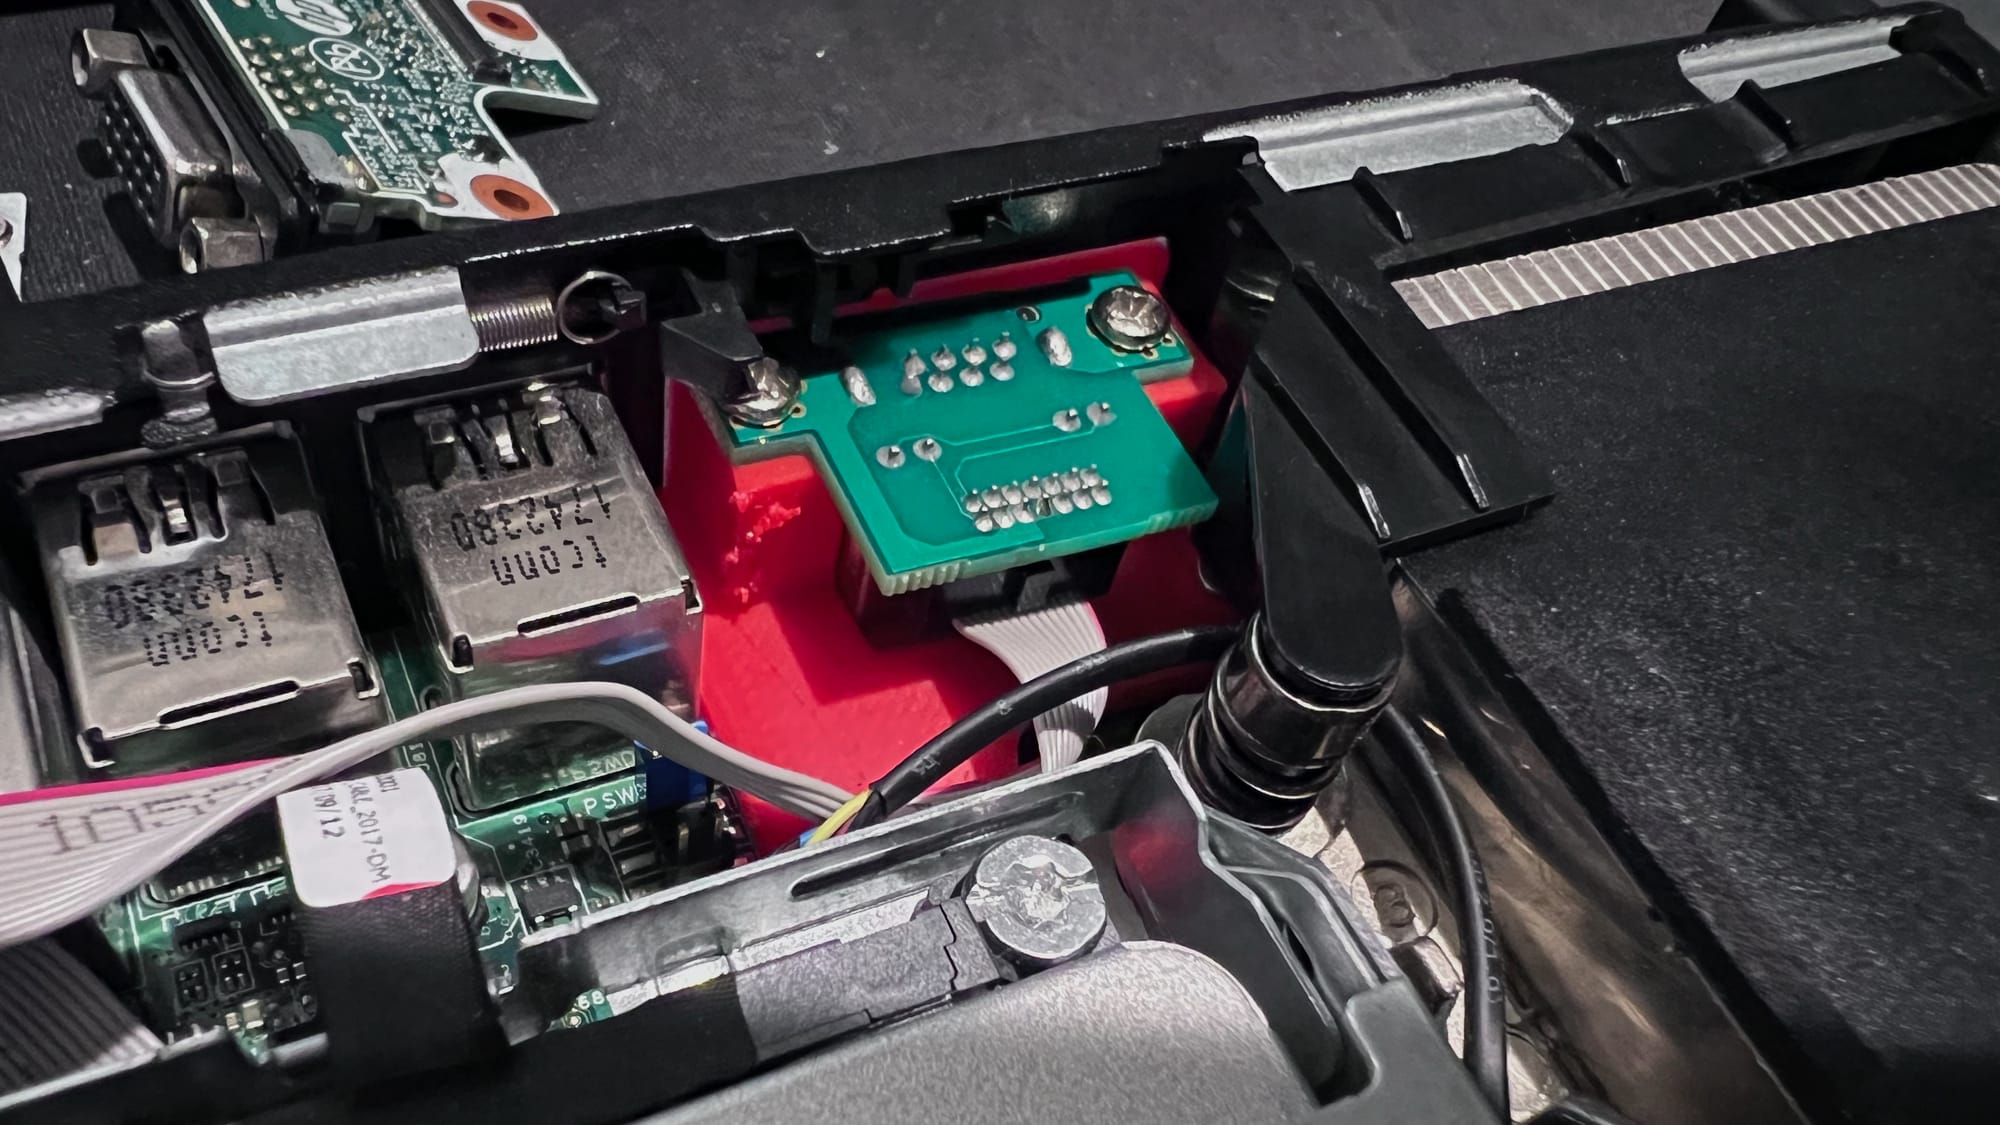
Optional: Replacing VGA adapter with a nice NIC enclosure (Requires a 3D printer)
Now, this is a bit risky. Once you remove the VGA adapter, you will not be able to quickly connect a display to your G3 mini anymore, unless if you have a USB display adapter available. Make sure you have means to access the administrative interfaces of the device before disconnecting the VGA adapter.
There are a few adapter designs in Thingiverse and all are really good. I landed on this one because it is closer to what VGA board looks like. I printed it with 20% infill. The screw holes aligned perfectly and they were of decent size for screws to hold on to. Below are some photos of the results. I printed it in red so that I remember it is not part of the machine originally.

Hello there!
Conclusion
HP Elitedesk 800 G3 Mini is a really versatile piece of hardware. Being able to upgrade the network speed of this device by using M.2 A+E key slot is such an impressive display of this device's capabilities. Here is the youtube video that started this experiment:
Special Notes
- If faced with an issue,
apt update && apt dist-upgradecan help. - More notes will be added if I recall more relevant information.
- Not that I needed it, but there is a blog post detailing driver installation for the NIC on Proxmox here.